Playing around with a green screen can be a very rewarding experience! But if you’re not confident in some basic lighting and editing techniques, it can also be very frustrating. In this blog and correlating video tutorial, we’ll be showing you how to properly light a green screen for a seamless key. It’s time to say goodbye to those harsh, pixilated outlines and green spill on your subject!
What is a green screen?
Simply stated, a green screen (or blue screen) is used to help isolate a subject in post production. You can then move that isolated subject onto other backgrounds and into other scenes.
We can tell our editing program to remove all the green and leave us with the other stuff to work with.
It is certainly possible to still key out a subject on a wrinkly, poorly lit green screen. But it’s an unnecessary challenge when you can simply start with a solid foundation.
Green screen set-up
We use a green screen from the brand Lastolite. It’s portable and easy to set-up on the fly. Highly recommend.
If you’re not working in a professional studio space, you can use black sheets and cardboard to block out any natural light coming through windows. In video production, the more control over lighting in the environment you have, the better.
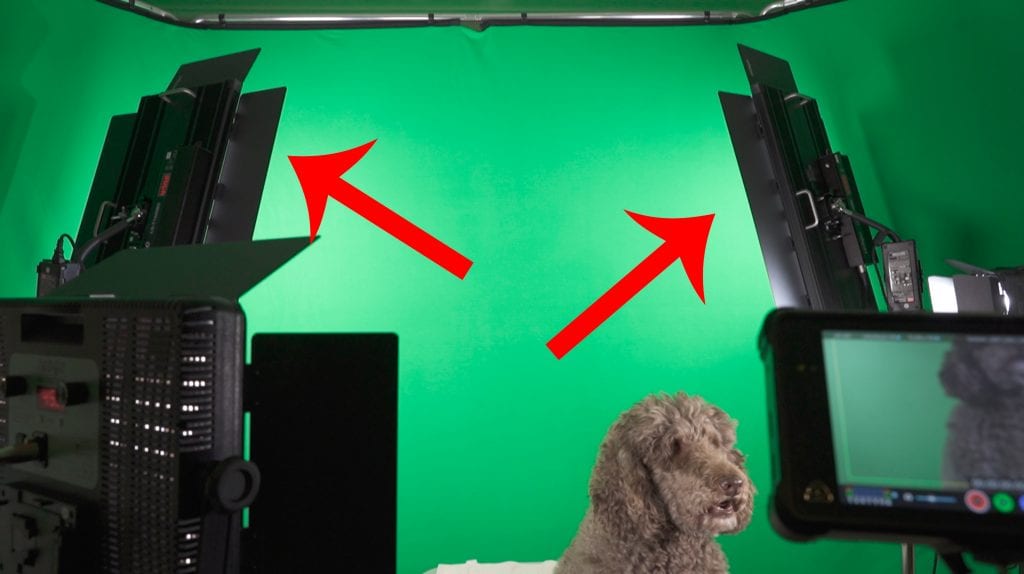
Lighting your green screen
When it comes to properly lighting the screen itself, the goal is to get the lighting as even as possible. The fewer tones of green, the easier it’ll be to work with in post production.
I recommend lighting the green screen separately from your subject. Try lighting it from the left and right with two large lights. We’re using large panel lights from LEDGO.
You’ll want to place your subject in front of these lights. That way you don’t have to deal with any shadows on the green screen.
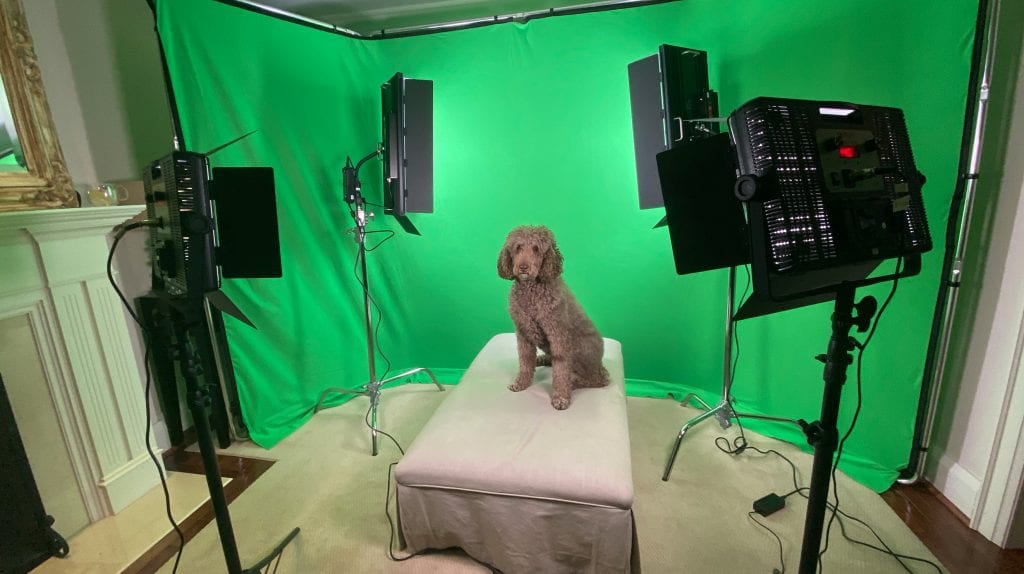
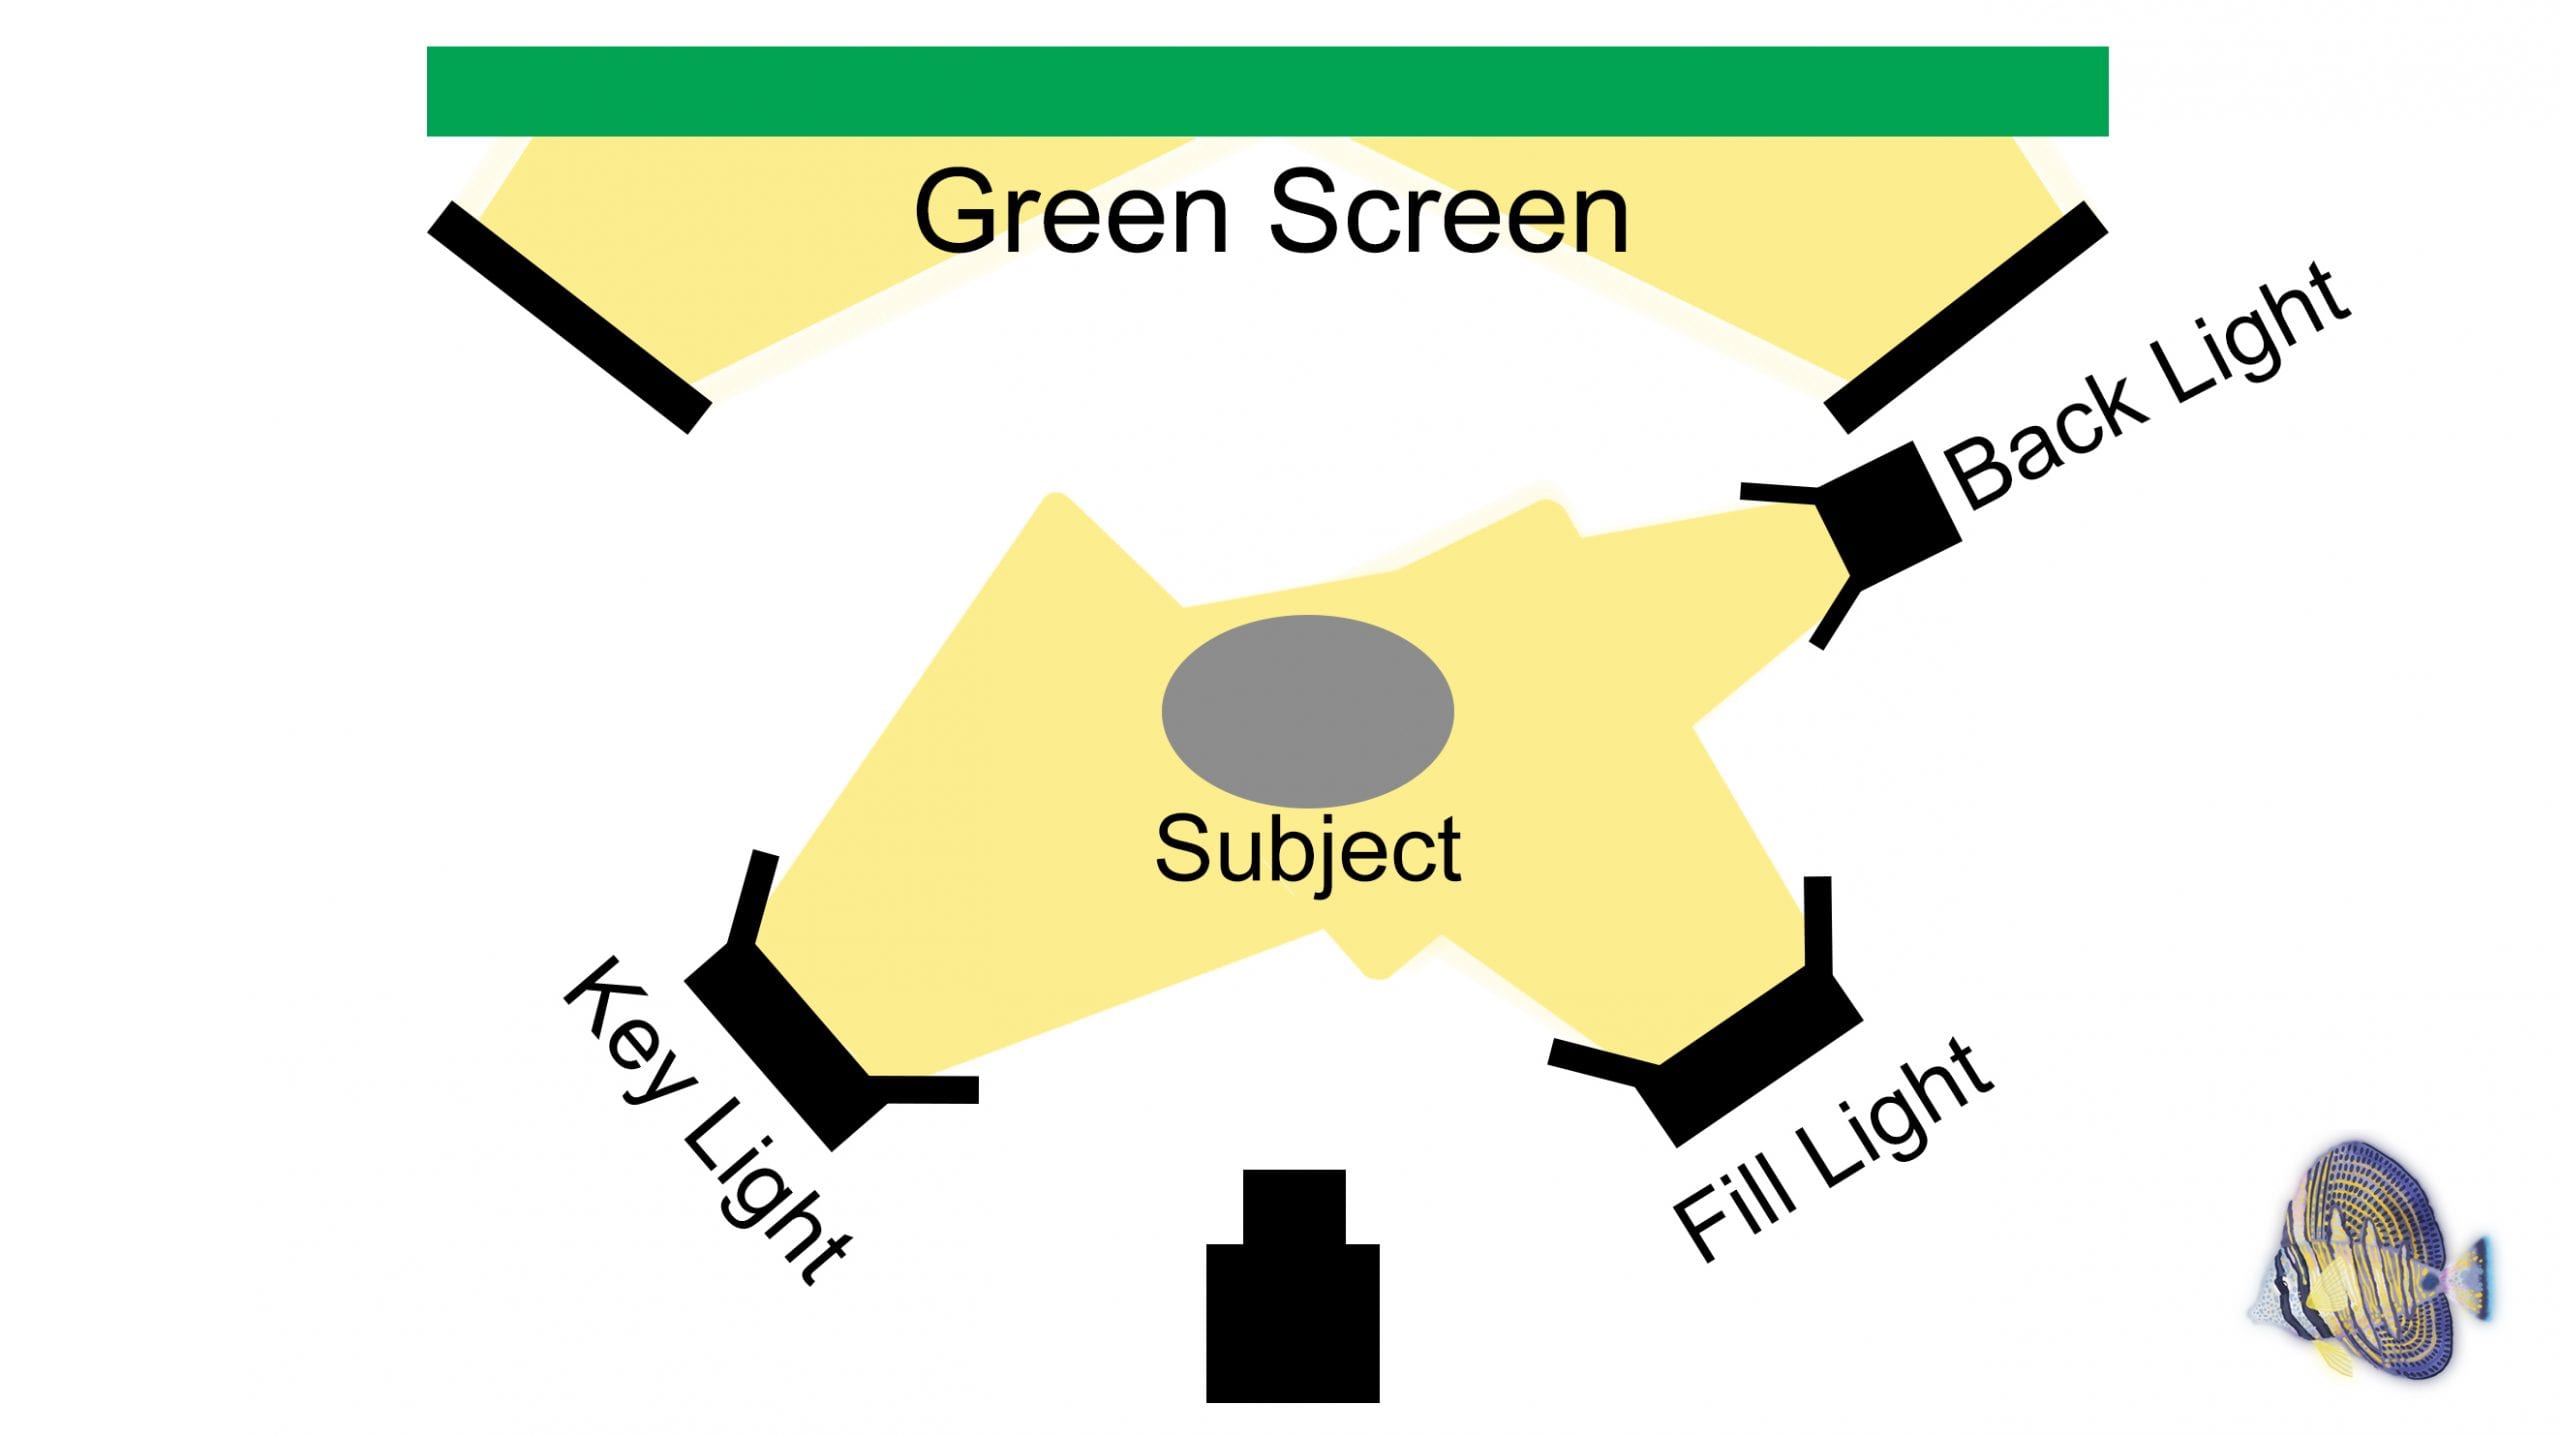
3-Point Lighting
We’ve spoken about this basic lighting technique in a previous article. To easily light your subject, I recommend using 3-point lighting. For a visual representation, you can see our lighting plan in the corresponding photo.
However, as long as your green screen is lit evenly, you can play around with lighting on your subject to create your desired mood.
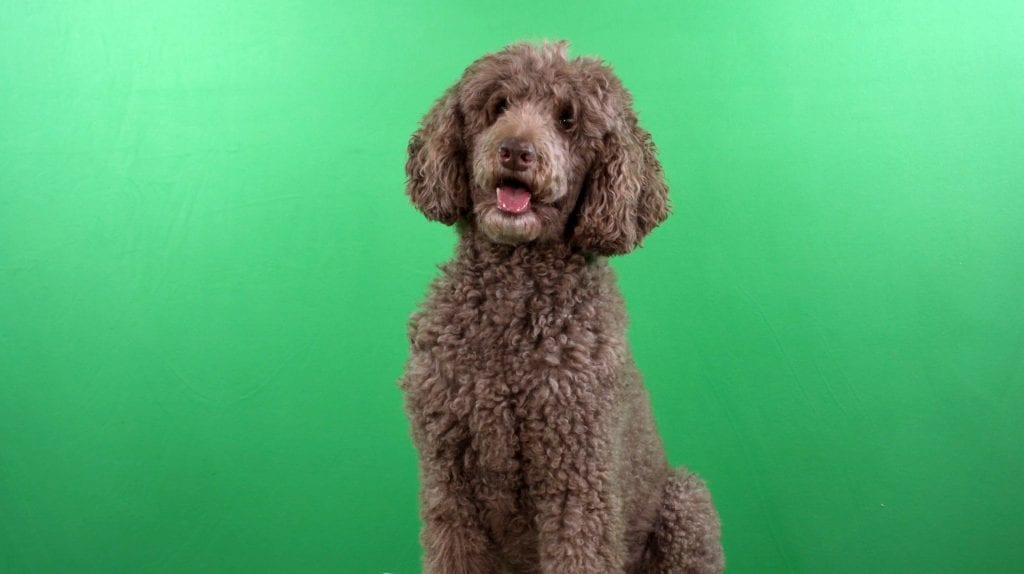
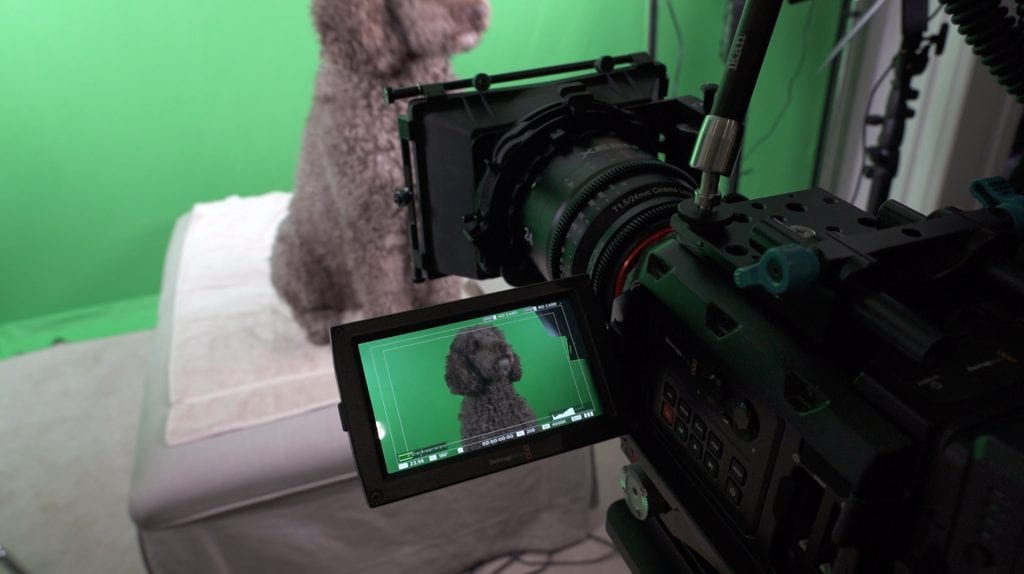
Shooting
Just in case you’re interested, we shot our footage on the Ursa MINI 4.6k with a 50mm lens. It goes without saying, the better quality your footage, the more detail in the shot you’ll have to work with when removing the green screen.
We also used the Atomos Inferno as both our monitor and recording device.
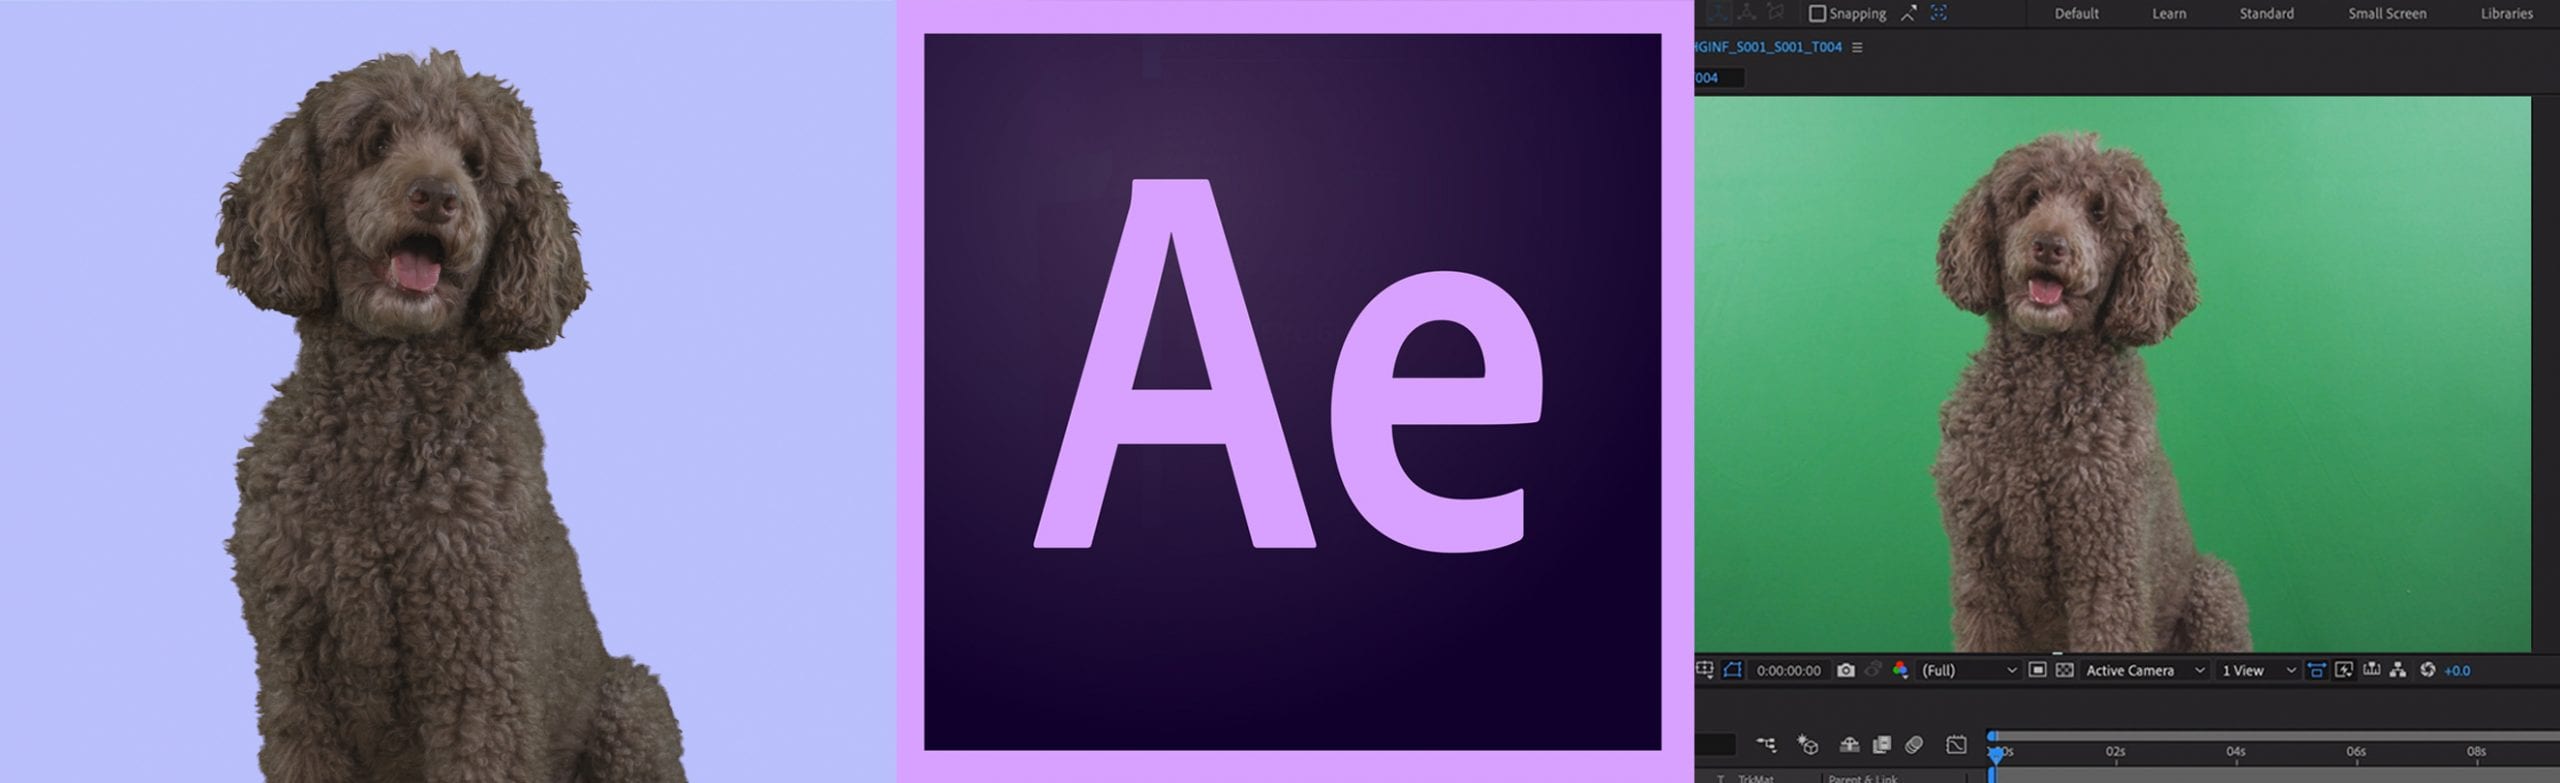
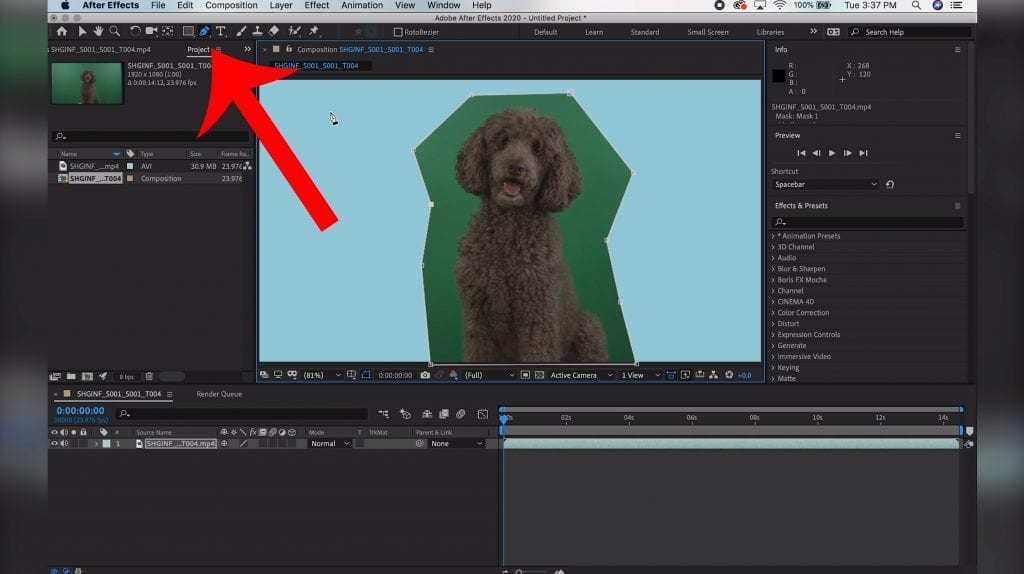
After Effects
To key out our subject in this tutorial, we’ll be using After Effects. However, you can accomplish similar results in alternate programs (including Premiere Pro).
Well be using a tool called: Keylight + Key Cleaner + Advanced Spill Suppressor.
TIP: you can create a mask around your subject using the pen tool if needed. This can help to remove lights or other parts of the shot if you’re only using the green screen behind a subject.
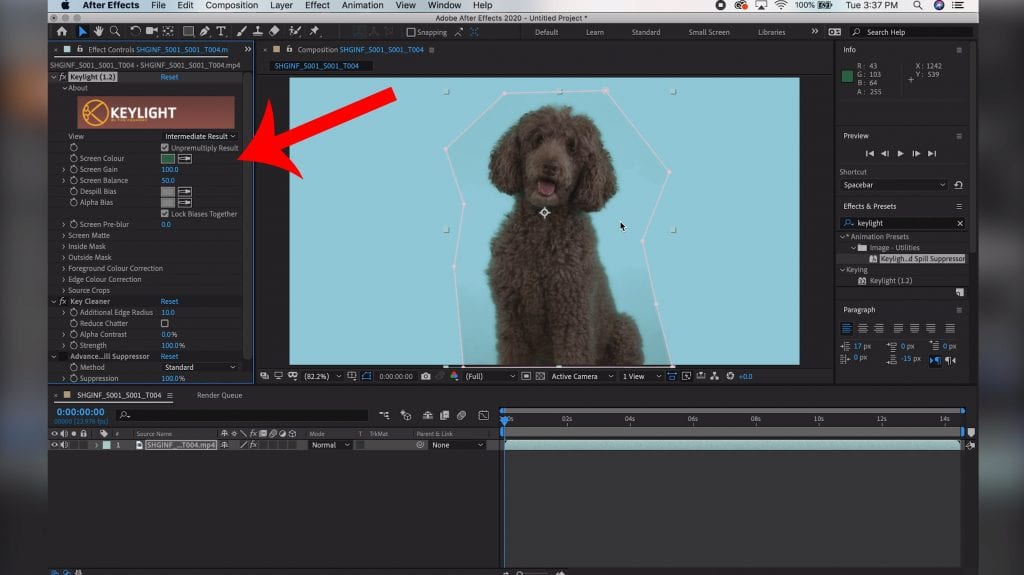
Remove the Green
Beside Screen Colour in the left menu, select a medium green on your screen using the eyedropper.
This should remove most, if not all, of the green in the shot! Already looking really great. But we can’t trust our eyes when it comes to this stuff…
Clip Black & Clip White
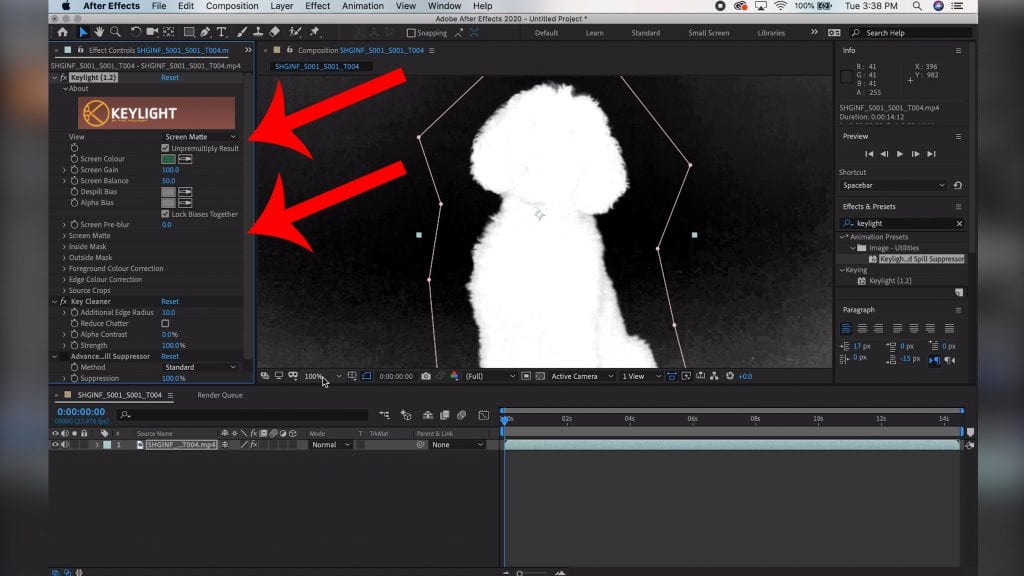
Change your view to Screen Matte in order to get a better idea of what we’re working with.
To have a perfect key, we want to get rid of all the pixelation in the black and white. To address this, we will adjust the clip black and clip white values in the left menu.
Once the black and white are sharp and crisp, change your view back to Final Result.
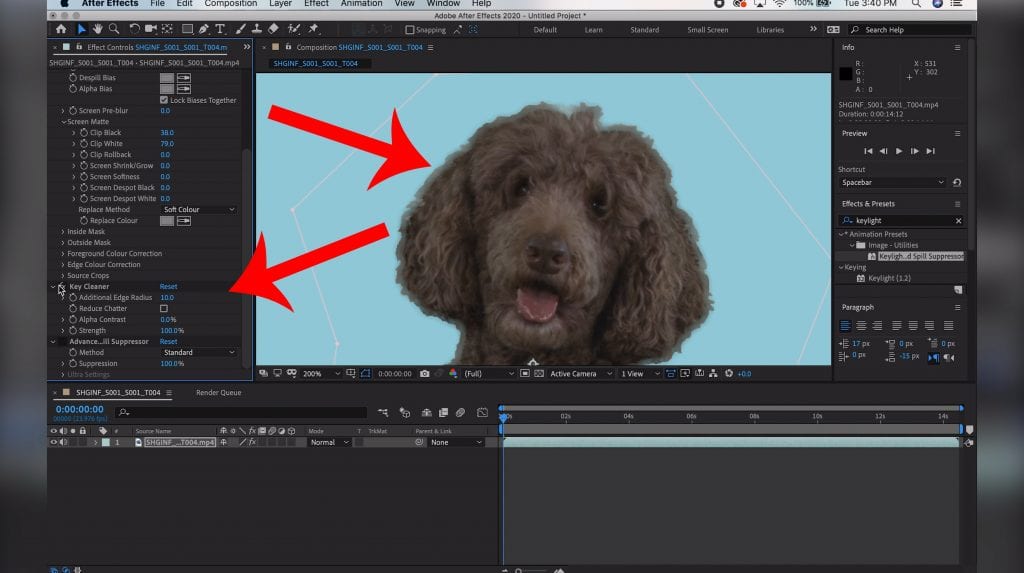
Key Cleaner & Spill Suppressor
The key cleaner works really well with fine human hairs. It helps to blend flyaways into the overall composition. However, in this particular shot, it looks quite muddy. Let’s turn off this effect to retain more detail.
The spill suppressor is great if you’re still noticing some green spilling onto your subject around the edges. Try toggling this effect on and off to see how it works for your particular shot.
Final Results
As you can see, there are some incredibly simple steps you can take to get a better final product when it comes to working with green screens.
But we’ve barely scratched the surface of what you can do! Remember to take the time to practice beginner techniques before moving on to more complicated ideas. Above all, have fun and get creative!
If you decide to try out this tutorial, tag us on Instagram, Twitter or Facebook so we can check out your work!