I’d like to preface this entire article by saying… portrait retouching is by NO means necessary. All faces are beautiful, and “imperfections” of the skin should be celebrated. With that being said, if you’re intrigued by the idea of portrait editing, it’s an incredibly enjoyable experience. Often in advertising and professional publications, photos are retouched to display a crisper and more polished final image. Frequency separation is one of my favourite techniques to accomplish this.
In this article and corresponding video tutorial, we’ll be removing unwanted blemishes (without loosing the texture of natural skin) and unifying the colour of our model’s face. Feel free to follow along by downloading a copy of the image I’ll be using to demonstrate this method of retouching.
Getting Started...
Begin with opening your desired image in Photoshop. If you’d like to practice, feel free to use our image. You can find a high-resolution copy at the end of this article.
Let’s duplicate the image twice. You can do this by holding down Command+J on a Mac or CTRL+J on a PC.
We’ll rename these layers. One layer for texture and one layer for colour. Our goal is to separate these two elements so we can edit one without affecting the other.
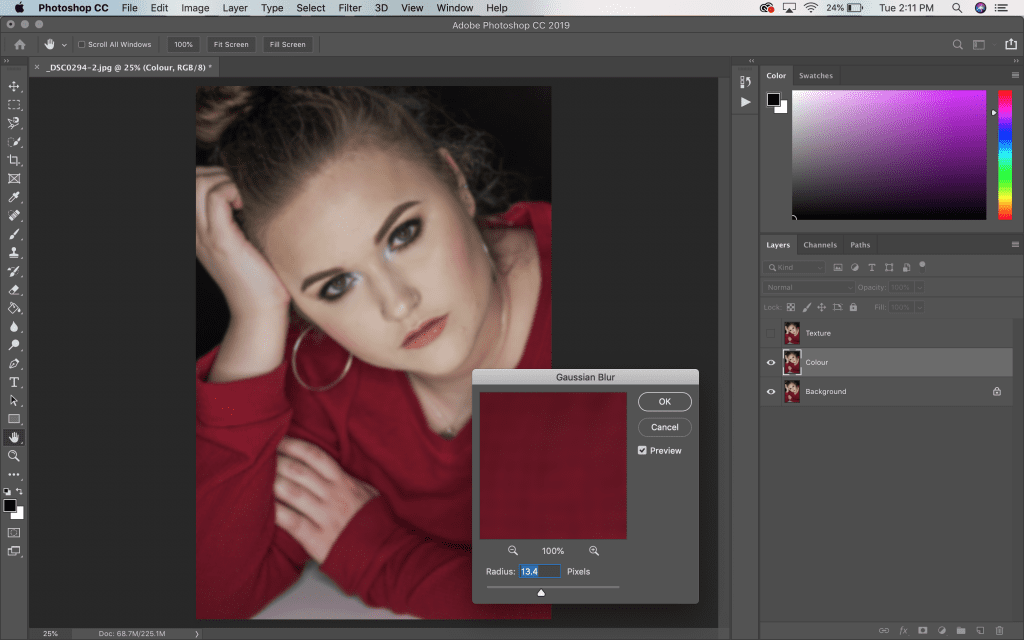
Gaussian Blur
Select the Colour layer from the Layers Panel. If your Texture layer is on top, turn the visibility off by toggling the eyeball icon.
Access the Filter menu at the top of the program and select Blur > Gaussian Blur.
Our goal is to achieve an airbrushed look to the skin. Don’t focus on other parts of the image. Pay close attention to the skin. We want it nice and smooth, but not without subtle distinction. In this example, I chose a radius of around 13.
Separating the Texture
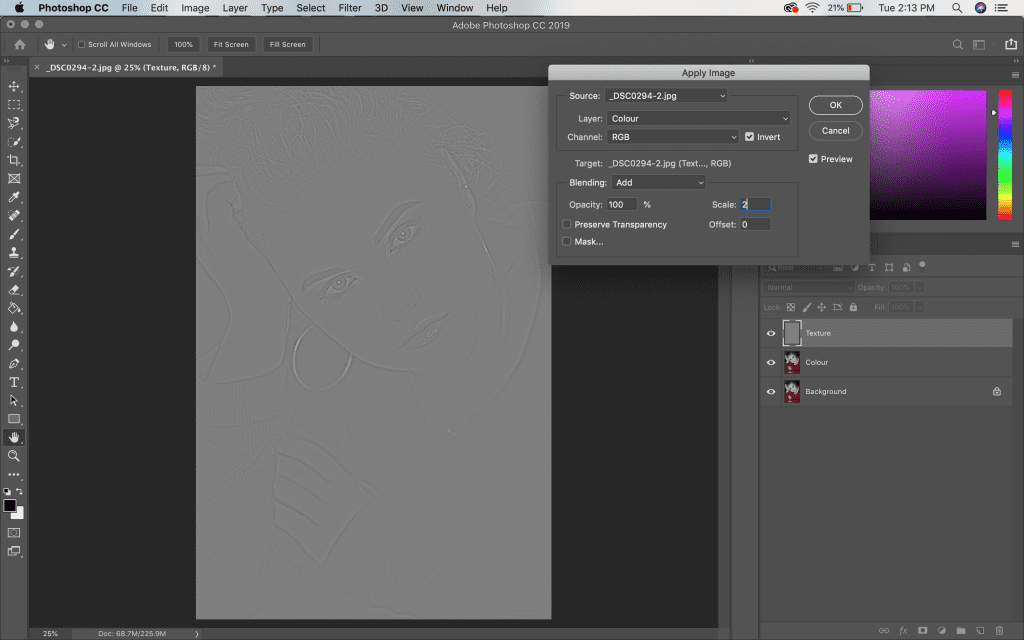
Now we must isolate the texture in this image and separate it from the colour. Select your Texture layer from the Layers Panel.
Access the Image menu at the top of your screen. Select Apply Image.
Layer is set to ‘Colour’
Channel is set to RGB (Invert)
Blending is set to Add
Opacity is set to 100%
Scale is set to 2
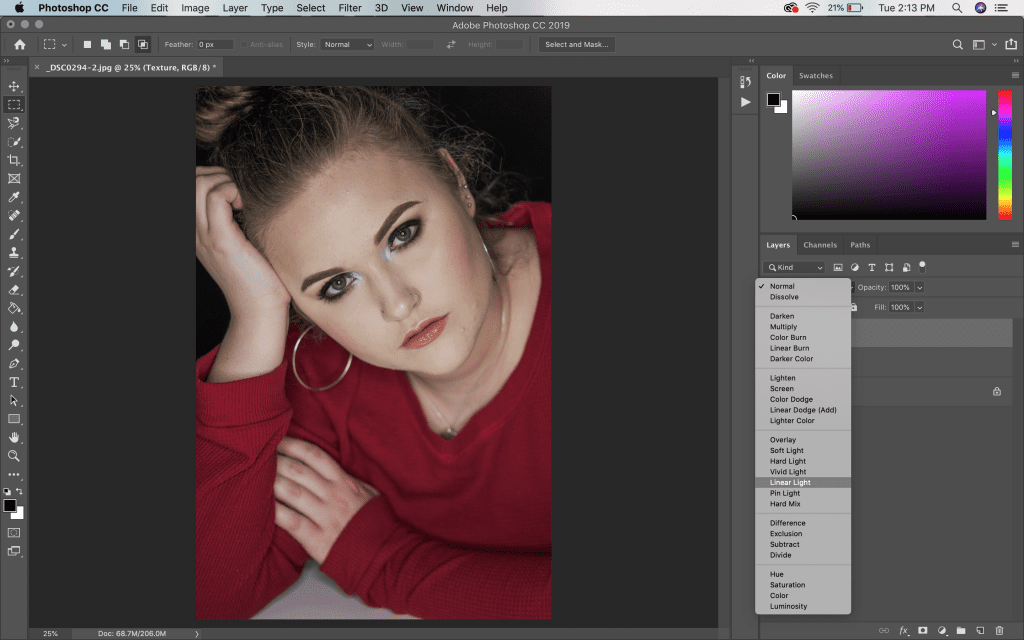
Blend Mode
Now we’ll set the Blend Mode of the texture layer to Linear Light. You can make this selection in the drop-down menu at the top of the Layers Panel.
Your image should now appear exactly as it did prior to making any adjustments. Toggle the visibility of the two new layers on and off to ensure there is no change from the original image.
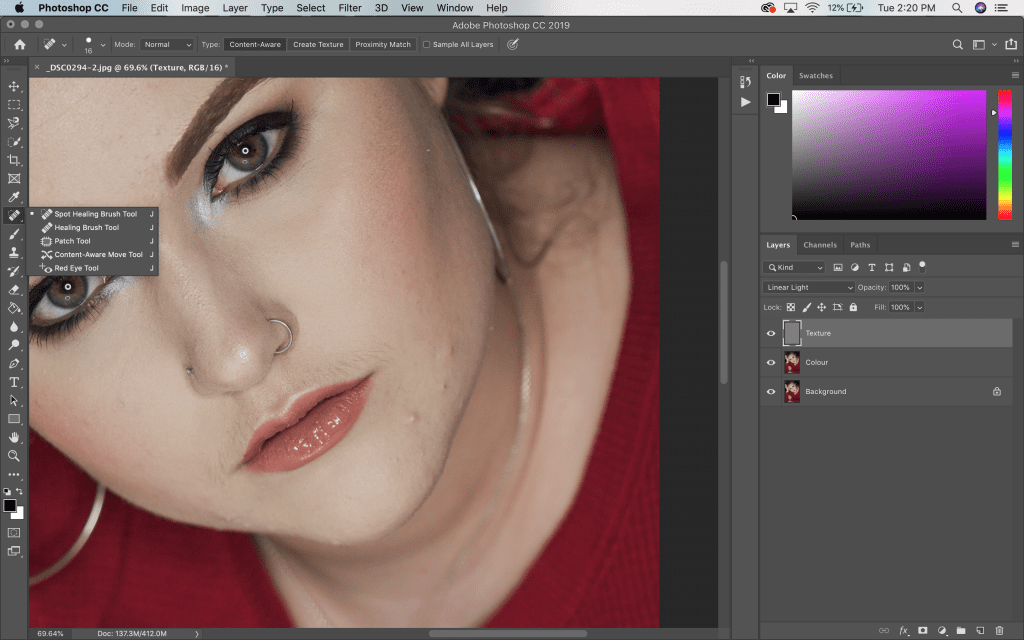
Removing Unwanted Texture
Let’s zoom in on the image using the magnifying glass icon. You can see there are some blemishes and uneven skin texture that we can clean up.
I prefer to use the Patch Tool to do this. However, the Healing Brush Tool works well too. These tools work by sampling clear areas of the skin and duplicating them to cover the textured areas. It takes some time, but it’s well worth it.
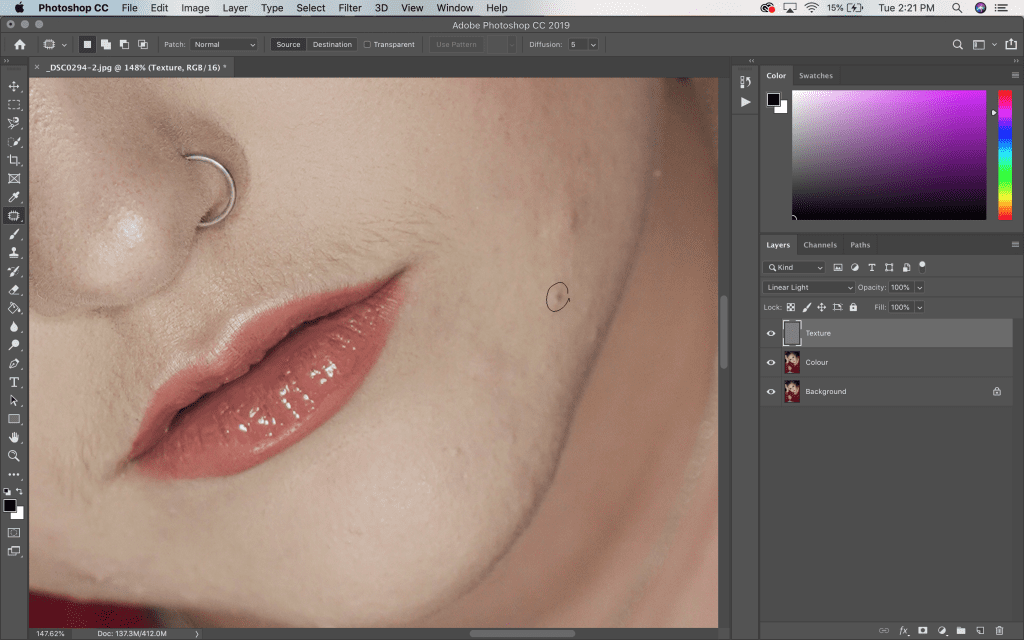
Patch Tool
Using the Patch Tool, draw circles around problem areas and drag the circle to a clean patch of skin to duplicate. Repeat this wherever needed.
You can use this tool for stray hairs, lines, blemishes and unwanted marks.
Keep in mind, this tool is only affecting the texture layer of the skin. It will not affect discolouration below (in the colour layer). Those details will have to be resolved afterwards.
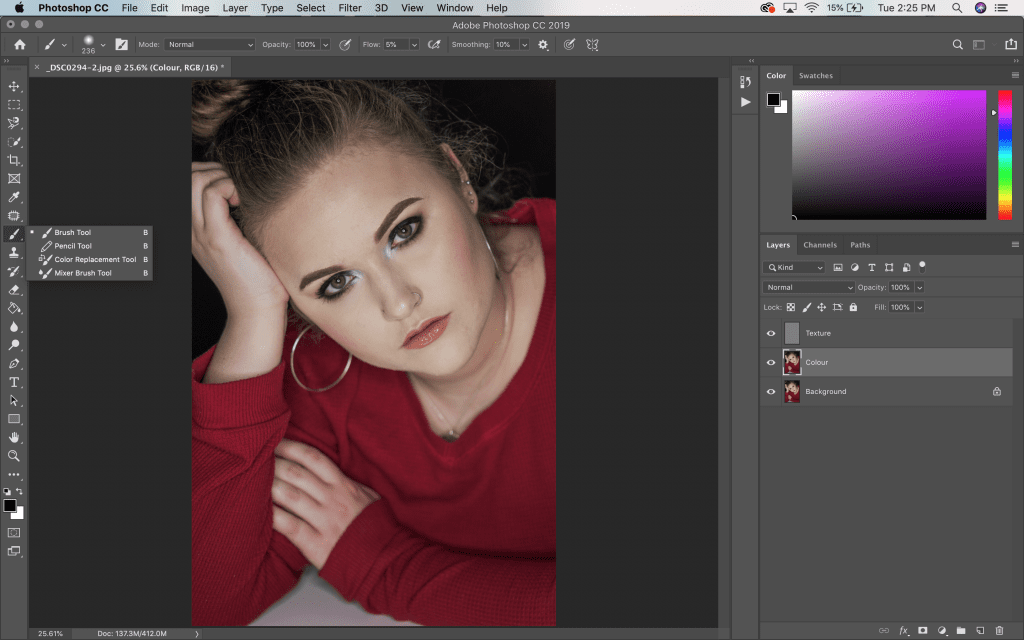
Even Skin Tone
Once you’re happy with the texture of your model’s skin, we’ll work on evening out the skin tone. Make sure you’ve got your Colour layer selected in the Layers Panel.
Select the Brush Tool from the left menu bar. I set the Opacity to 100% and the Flow to 5%.
Let's Get Painting!
Now we’ll be airbrushing the skin to ensure the tone is even. You can use the Eyedropper Tool to sample the exact colour of each part of the face.
Using the Brush Tool, brush over the areas of skin you’d like to shade with the selected colour. Remember, you’ll have to re-sample colours whenever you begin working on a new part of the face.
Pay specific attention to the problem areas you removed texture from. Ensure the colour in those areas reflects the improved texture.
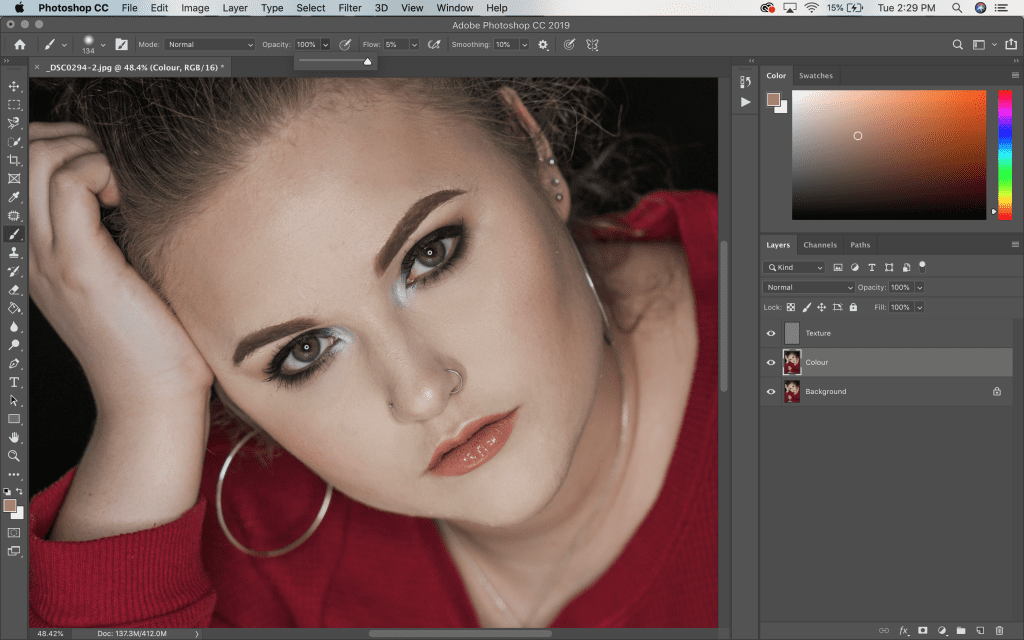
Final Image
Congratulations! Your image looks great. Remember to remove visibility on your Colour and Texture layer in order to see the original photo beneath. It can be quite helpful to toggle between the original and edited photo while working. This clearly reveals areas where you may have gone overboard. In the end, it’s all about personal preference.
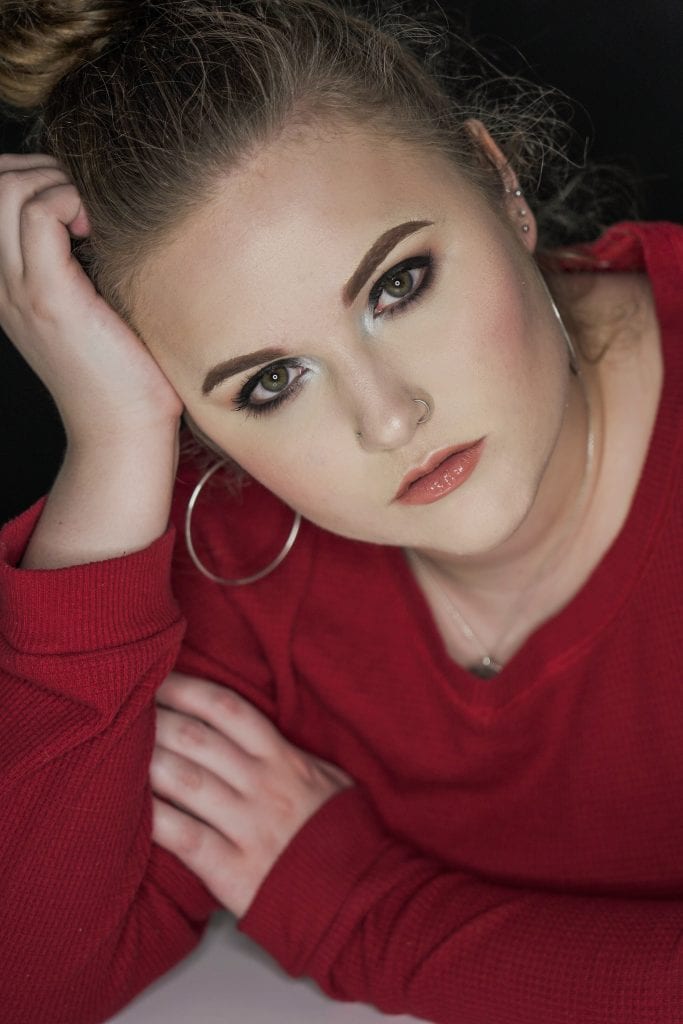
Below you will find our un-edited photo and our final product. Feel free to use this photo to practice your own retouching skills on Photoshop!
Before
After
So there you have it! An introduction to photo retouching using frequency separation! However, we’ve barely scratched the surface of what this program can do. We will continue to dive deeper into more specific tutorials in the future. Don’t be afraid to make mistakes and explore different tools to find your favourite way of working. Above all, let your creativity flow and have fun!